Identity verification
What do you need?
Add your ID document
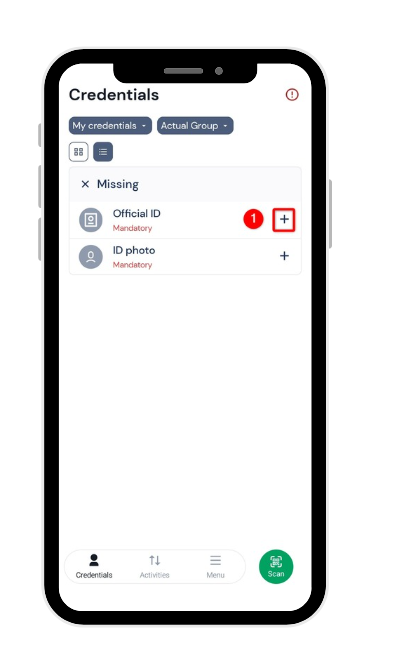
Go to the Documents section of your app: tap the + button next to ID document to start registering your document.
Choose your document
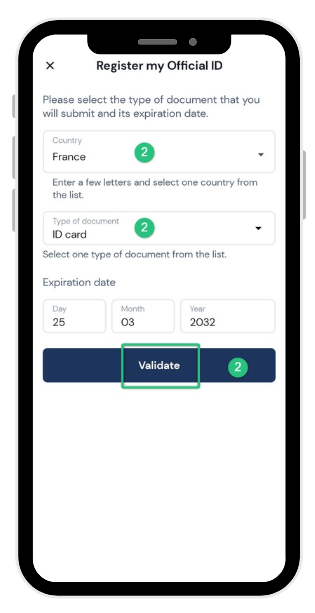
Select the country that issued your document, specify its type and expiry date, then tap Confirm to continue.
Do you have an expired residence permit with a receipt? The receipt alone is not accepted: select Residence permit as the document type and enter its actual expiry date (even if it has passed). Once this step is confirmed, we'll automatically offer to add your renewal receipt as well.
Enter your personal information
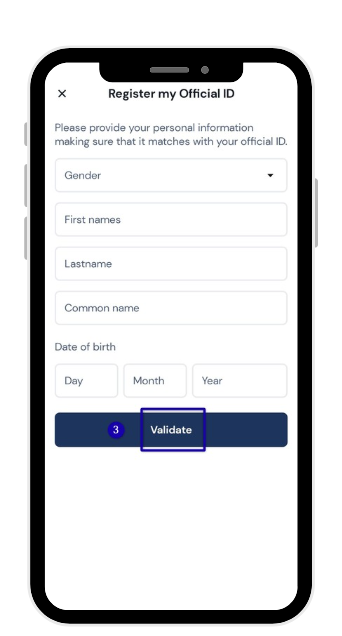
Carefully enter your personal information (last name, first name, etc.), exactly matching what's shown on your ID document. If you don't have a preferred name, simply leave this field blank. Once ready, tap Confirm.
Enter your place of birth
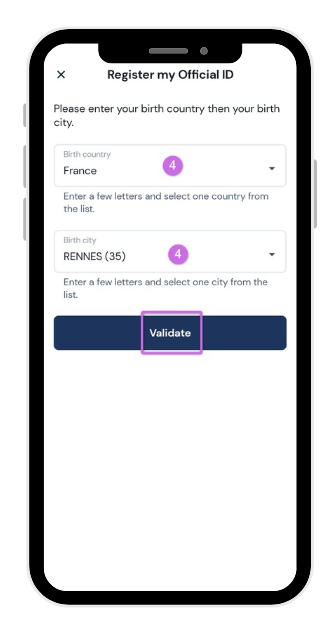
Enter your country of birth and city of birth, then tap Confirm to complete this first part.
Start the verification
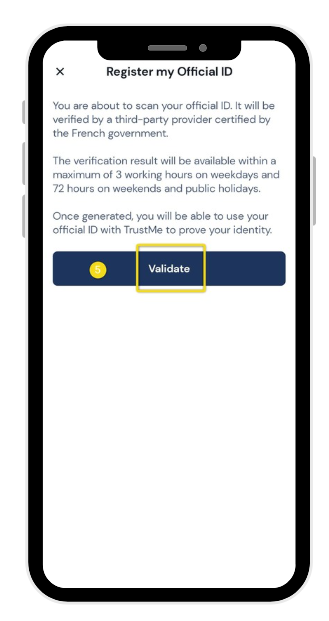
You're about to scan your official ID document, which will be verified by a provider certified by the French government. Results will be available within 3 business hours (up to 72 hours on weekends or public holidays). Tap Confirm to continue.
Start your identity verification
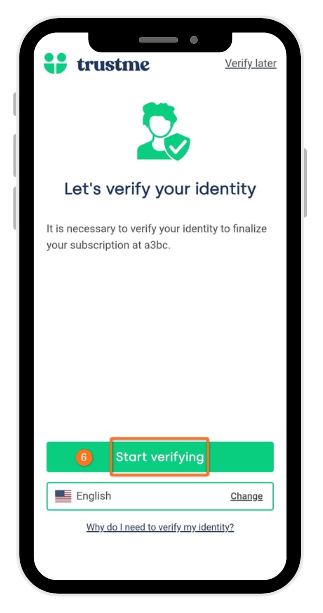
This step is required to finish your request: you'll film your original, valid ID document, then your face. Check that the country shown is correct, then tap Start my verification.
Confirm where you live
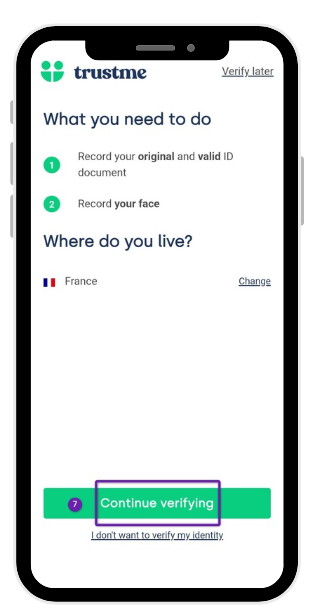
Confirm your country of residence, then tap Continue my verification to proceed.
Select your document
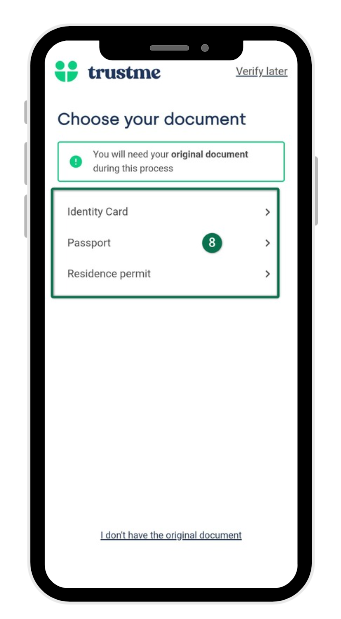
Choose the type of document you have: ID card, passport, or residence permit. Make sure to keep your original document with you for the rest of the process.
Having trouble at this step? Check our dedicated help page to resolve the issue.
Start scanning your document
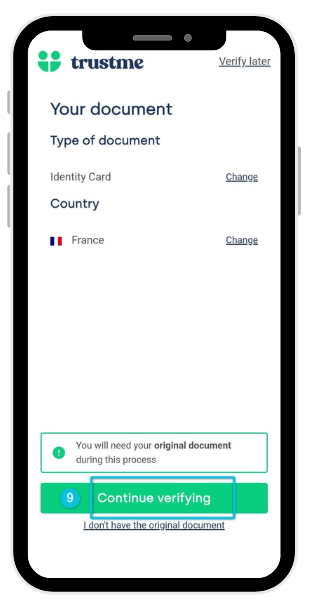
Tap Continue my verification to start scanning your document.
Hold the front of your document in your hand
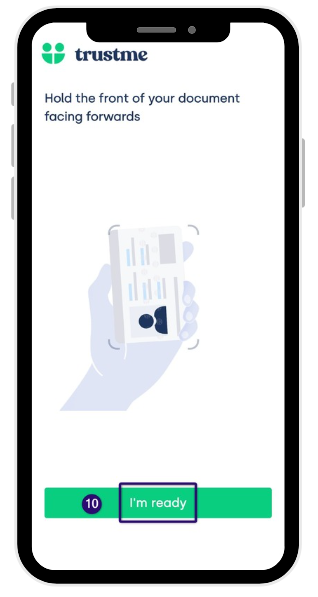
Hold the front of your document (photo side) clearly in view, in a well-lit place, without glare or fingers over the text. Once ready, tap I'm ready.
Expired residence permit + receipt? You need to film your actual residence permit card at this step (even if expired), and definitely not the receipt. Make sure the receipt doesn't appear at any point in the video: otherwise, the verification will fail.
Turn your document over
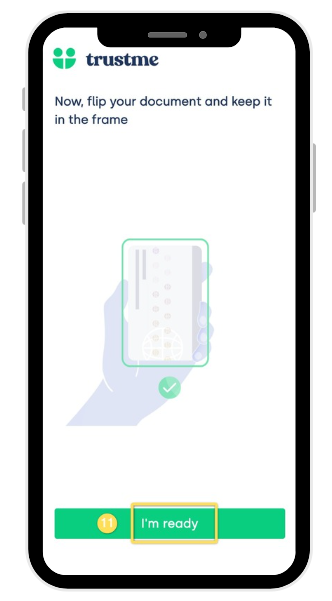
When prompted on screen, turn your document over to film the back.
Move on to face verification
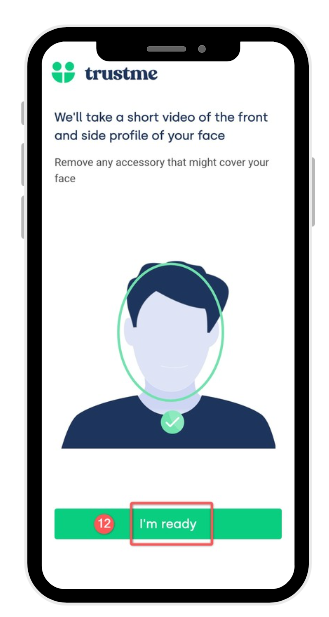
Your face must be clearly visible: remove anything that could hide it (glasses, hat, etc.). Tap I'm ready, then gently turn your head from left to right when prompted.
Wait during the review
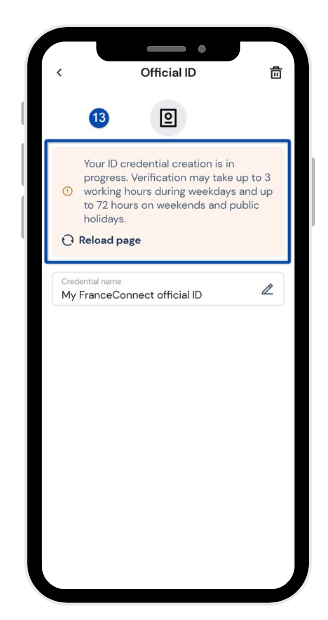
And that's it! Your document is now being reviewed. This step can take up to 3 hours on weekdays (up to 72 hours on weekends or public holidays): we'll let you know as soon as the result is available.
Need more information?
Our team is here to help. Contact TrustMe support.